 |
|
|
|
Page 1 of 4 - How to make "Birds on Branches" in Stained Glass

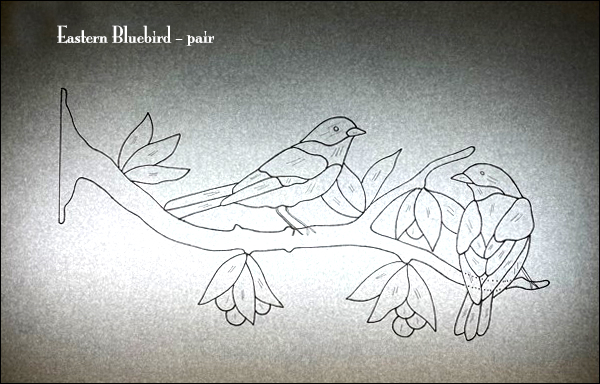
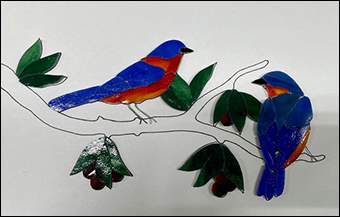
This tutorial will take you from start to the finish of a Birds on branches project. I will start with the pair of Eastern Bluebirds, but other projects may be introduced depending upon the point I am trying to convey. I believe some of my methods are unique to myself and the many people I have had the pleasure of instructing over my 44 years as a stained glass craftsman.
I will show you how I cut patterns, a tip on foiling, and my unique soldering method, as well as the best way I have found to get a nice dark patina finish.
Click on the steps below to advance to the desired topic (there are 5 steps on each page):
You are on Page 1 - Steps 1 - 5
Step 1 - Lets get started!
Step 2 - Making patterns and working with a light box
Step 3 - Cutting shapes traced on a light box with a razor knife
Step 4 - Selecting sections of glass with your pattern card
Step 5 - Grinding and test fitting before foiling
To Page 2
Steps 6 thru 10 - Beginning with Step 6 - Compressing foil to the glass
To Page 3
Steps 11 thru 15 - Beginning with Step 11 - Tips on edge/perimeter beading
To Page 4
Steps 16 thru 20 - Beginning with Step 16 - My set-up for applying the patina
Step 1 - Lets get started! |
|
|
 |
|
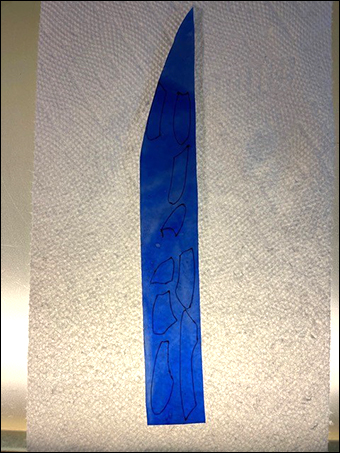
My first step is to mark the pattern with the direction of how I want the grain of the glass to flow. I pencil in scratch marks on the pattern that will guide my pattern cutting. Note, every piece of glass to be cut for the bird and the leaves has two line markings. The line markings will indicate how I intended the grain of the glass to flow when I transfer each glass shape to my pattern card. Pattern cards, something you are probably not familiar with, I will explain. |
|
|

|
|
|
Step 2 - Making patterns and working with a light box |
|
|
 |
|
|
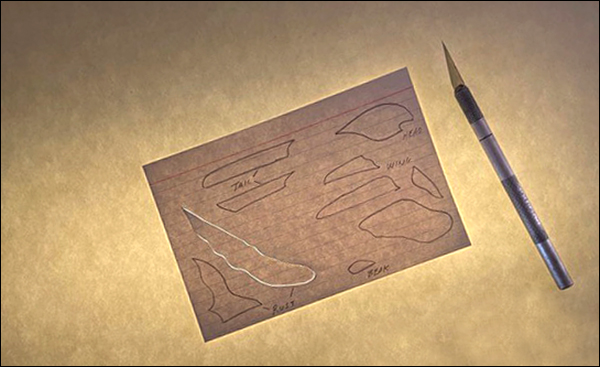
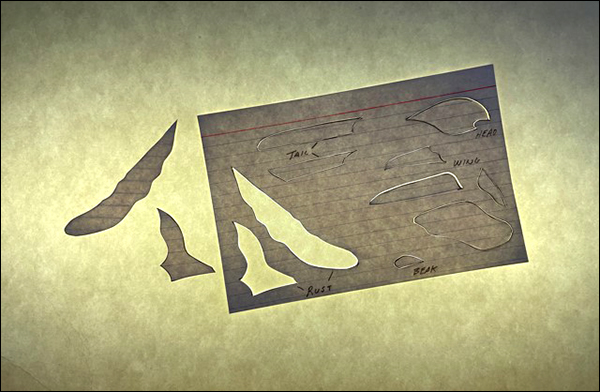
My preferred method of making patterns is on index cards, I call my system of pattern making “negative patterns”. Instead of tracing around a cut-out paper pattern piece, I use the cavity created by the cut-out. When the pattern card is placed on the glass, the cavity lets me see any imperfections in the glass I may want to avoid. The cut-out also guides my marker against the edge of the paper as I trace. The whole process of tracing the pattern onto an index card, cutting out the pattern, and then tracing it onto a piece of glass reduces the size of the piece just traced so the fit is almost perfect. The resulting slightly smaller glass pieces correspond to the pattern almost perfectly. There is room for the foiled edges and any slight discrepancies in the hand cut piece of glass. All the cut and foiled glass pieces do not expand beyond the boundaries of the pattern, within reason.
The “negative pattern” method is especially beneficial if you are making multiple birds or other items you may produce in quantity.
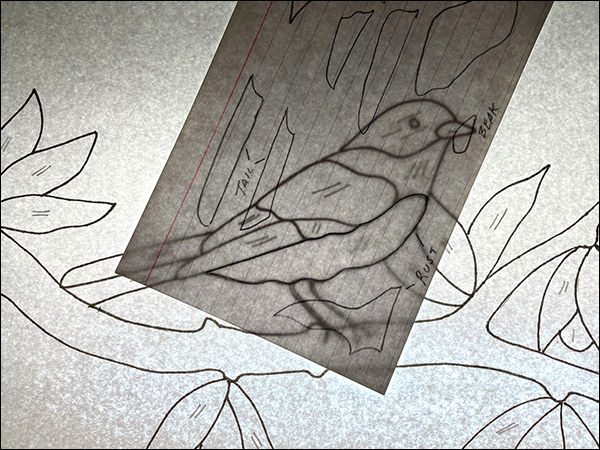
Working on a light box I trace onto a lined index card every shape of glass that will need to be cut. The lines on the index card correspond to the direction of the grain of glass I have chosen. The Eastern Bluebird pattern shows how I have traced the under belly of the bird. Note the faint scratch marks on the pattern correspond to the lines on the index card. Other pieces on the index card have already been traced directionally with the lines on the card and labeled. I will often label the head, wings, and tail feathers if they are to be different colors or tones of the same color. |
|
|
|
|
|
Step 3 - Cutting shapes traced on a light box with a razor knife |
|
|
 |
|
|
Continuing to work on the light box I cut all the shapes I have traced with a razor knife. The light box has a thin piece of white cardboard between the glass and the index card, the cardboard acts like a cushion so the blade does not dull as quickly as if it was in contact with the glass light box.
Cutting on the light box lets me see if the cuts are clean, no paper tags still attached to the card. |
|
|
|
|
|
Step 4 - Selecting sections of glass with your pattern card |
|
|
  |
|
|
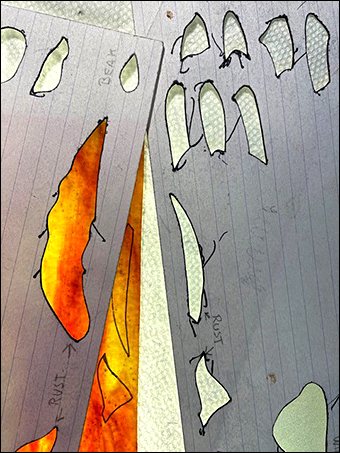
Image above left - Placing the pattern card on the glass allows me to see the color intensity, shading in color value, and most importantly, any flaws that may be in the glass. I arrange the pattern card over the glass to avoid scratches, large air bubbles, stretch marks, and any unsightly imperfections.
Image above right - This photo shows how I selected the premium sections of glass all-the-while avoiding air bubbles. |
|
|
|
|
|
  |
|
|
Image above left - The photo above shows how effective negative patterns are when determining the perfect transition from light to dark, or transitioning from one color to the next. I want the underside of the Bluebirds belly to have multiple values of color, light, and intensity. Using negative patterns to see exactly how colors and tone blend in each individual piece of glass before I cut it is often the difference between a hand crafted item, or a work of art.
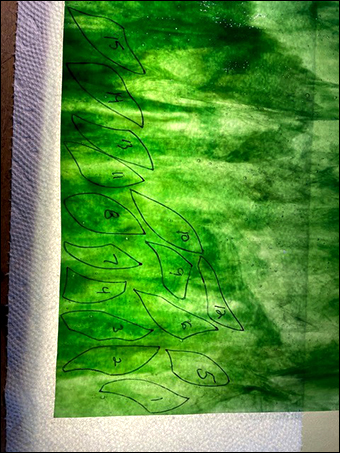
Image above right - This photo shows how I have transferred the leave patterns onto sheet glass. Most of my cutting is done on a light box with a paper towel between the light box, and the glass I am cutting. The paper towel acts like a little cushion against the hard glass surface of the light box. Hand made glass is never perfectly smooth, I am sure the paper towel has saved many pieces from cracking while scoring/cutting. |
|
|
|
|
|
Step 5 - Grinding and test fitting before foiling |
|
|
  |
|
|
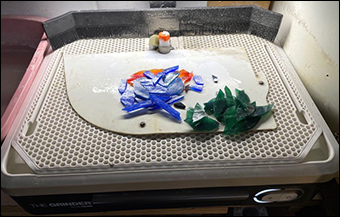
Image above left - All my glass has been cut, ready to spend some quality time with my grinder.
Image above right - With the grinding all done its time for a test fitting before foiling. I often have to revisit the grinder for a more precise fit. Usually the branch will be placed on the pattern for the test fitting. In the Bluebirds project the bird on the right is to be attached as an overlay preventing me from using the branch as a guide. |
|
|
|
|


