|
Page 4 of 4 - How to make "Birds on Branches" in Stained Glass

Click on the steps below to advance to the desired topic (there are 5 steps on each page):
To Page 1
Steps 1 - 5 Beginning with Step 1 "Lets get started!"
To Page 2
Steps 6 - 10 Beginning with Step 6 "Compressing the foil to the glass"
To Page 3
Steps 11 - 15 Beginning with Step 11 "Tips on edge/perimeter beading"
You are on Page 4 - Steps 16 thru 20
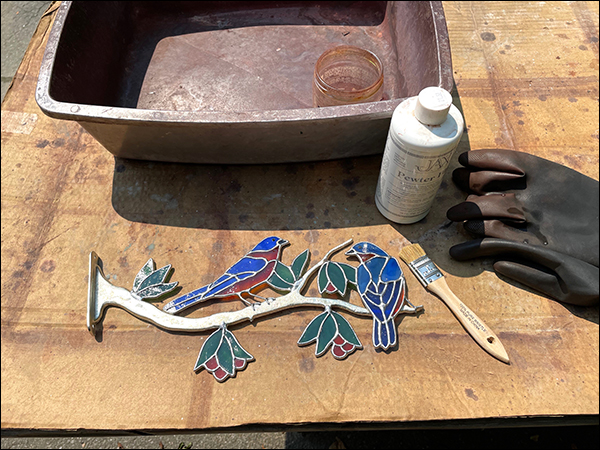
Step 16 - Set-up for applying the patina
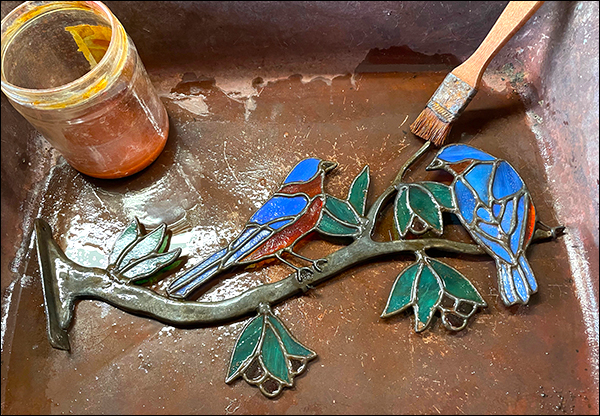
Step 17 - Applying Jax Pewter Black
Step 18 - Cleaning station, waxing, brushing/buffing
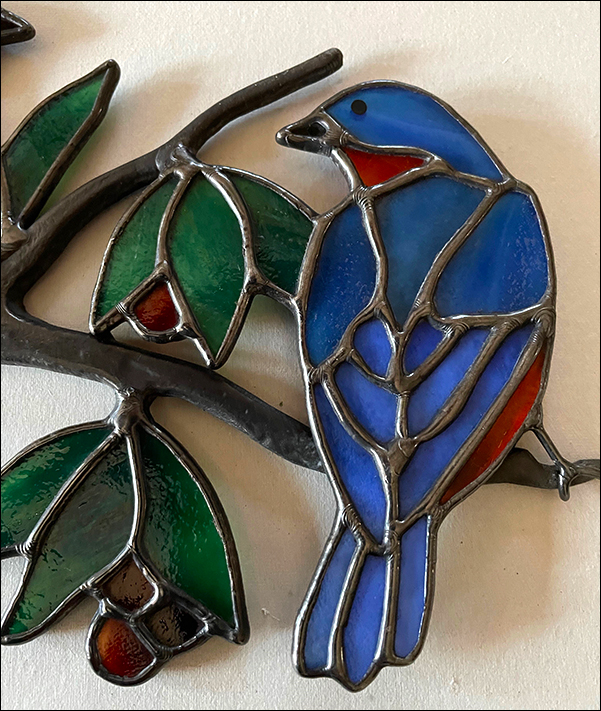
Step 19 - A close-up of the soldering, patina finish, and waxing
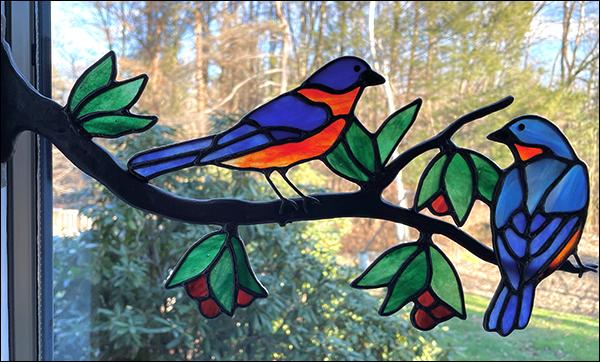
Step 20 - Bluebirds project done!
Step 16 - Set-up for applying the patina |
|
|
This is my set-up for applying the patina, there are other methods, this is how I do it. I use a tub large enough to contain the Bluebirds, a one inch brush with half the length of the bristles cut off to reduce splashing, rubber gloves, and a separate jar for the patina so I dont contaminate the whole bottle.
After all the soldering is complete I wash the piece with dish detergent. The next step is to heat up the piece, in the summer I place it on my hot driveway for about an hour. In the winter it goes next to my heater (I live in New Hampshire) or I use a hair dryer to heat it up.
Jax Pewter black is applied with a brush, while wearing gloves, in a well ventilated area. The patina does give off fumes, I try to avoid them. I then wash the project with dish detergent. Depending upon how dark the patina came out I may reheat and the piece and reapply a second coat of patina. It is often, but not always the case, that the first application of patina acts as a primer for the second application. After the second application of patina I wash with dish detergent again, then set it aside to dry. Once the piece is dry it may have a chalky blackish gray appearance. A coat of glass wax seems to darken and add a shiny luster to the patina and the glass. |
|
|
The Jax Pewter Black has been brushed on, front, back, and the perimeter. Next I will wash the birds with dish detergent. A trimmed down paint brush also comes in handy for washing. I would like the patina a little darker so I will dry and re-heat the birds before I apply the Jax for second time. |
|